So you’re the proud owner of a gas-impingement rifle like an AR15. You blew through some ammo at the range over the past few weeks and now you’re at home thinking.
“I need to learn how to clean this thing.”
Granted, cleaning an AR15 is a little more involved than cleaning a single-shot, break-action 12 gauge, but it’s still not neurosurgery.
Here’s what you need to know.
Preparation
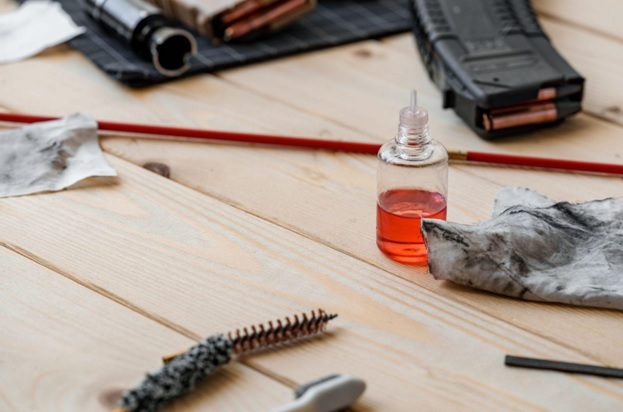
First, you need to make sure you have the cleaning essentials. You will need:
- A clean place to work that is well lit
- Pin punches for assembly and disassembly
- A cleaning solvent (like Hoppe’s No. 9)
- A gun lubricant
- A cleaning rod
- Bore brushes
- Cleaning jags
- Cleaning patches
Then you need to partially disassemble the rifle.
First, drop the mag and lock back the charging handle. Visually and physically inspect the chamber to ensure the rifle is not loaded.
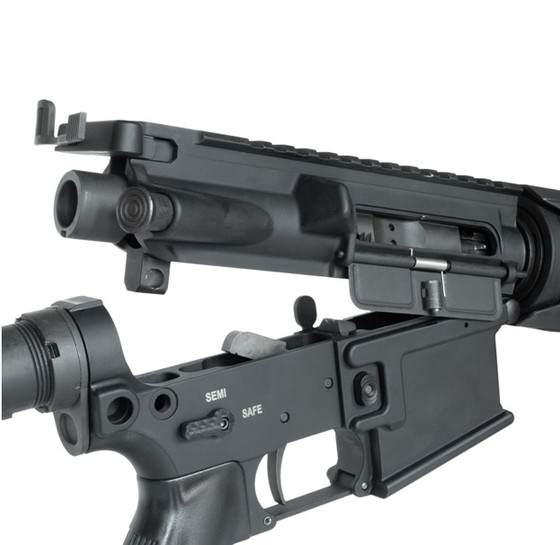
Then, separate the upper and lower receiver by removing the takedown pins.
From here, remove the charging handle and bolt carrier group from the upper.
Then remove the buffer components from the buffer tube.
The Chamber and Barrel
First, we’ll turn our attention to the chamber and barrel, where the most fouling will accumulate.
Select an appropriately sized bore brush and soak it in cleaner; then run it through the bore from chamber to muzzle.
Always clean in this direction to prevent damaging the muzzle crowning.
Once you’ve made a few passes, remove the brush and attach a jag with a clean patch. Run this through from chamber to muzzle. It should come out black. Replace with a clean patch and repeat till the patches come out clean.
The Bolt Carrier Group
Now let’s look at disassembling your bolt carrier group and cleaning the components.
You’ll need an appropriately sized punch to remove the extractor pin; remove this and place it aside.
Then you can remove the firing pin.
Clean each component with a nylon brush and wipe clean with a rag. Pay particular attention to the front of the firing pin where fouling can accumulate in the channel, making it difficult for the pin to strike the primer.
Once complete, treat with a lubricant; give a very light coat before reassembling.
The Buffer System
This part is relatively easy. You can leave the buffer tube itself alone. You’ll want to clean the spring and buffer weight, though.
Use an appropriate cleaner and a clean rag or a nylon brush to clean off any fouling deposits or tar from the buffer spring. Unlike the BCG and barrel, it should be fairly clean.
Then, dry the spring fully before applying a very light lubricant, the purpose of which is only to serve as an airtight barrier to corrosion.
The AR15 Charging Handle
Next we need to clean the AR15 charging handle. Sometimes, fouling gets behind the BCG and coats the AR15 charging handle as well as the channel in the upper receiver it runs through.
As before, you will need either a clean rag or a nylon brush. Clean off the outside of the charging handle as well as the portion of the upper that carries it, then lightly coat with an appropriate gun oil, like Rem Oil.
The Fire Control Unit/Trigger Group
Once you’ve cleaned the chamber, barrel, bolt carrier group, buffer tube system and AR15 charging handle, you can turn your attention towards the fire control unit.
Normally this area shouldn’t get too coated in fouling, so all you should need is a good nylon brush to reach down into the crevices of the lower receiver with the FCU is housed.
If it is particularly dirty, remove the FCU/trigger assembly and wipe these clean before reassembly.
Special Notes on Suppressors and Skeletonized AR 15 Parts
One more note we need to offer on a few different parts.
One, if your rifle is suppressed, it will need to be more thoroughly cleaned, and more frequently, before suppressors increase chamber pressures and blast a lot of fouling back into the bore and action.
You will also need to pay particular attention to the suppressor itself, as these muzzle devices can get pretty full of fouling, pretty quickly.
Another is if you have any skeletonized AR 15 parts, you need to be extra-sure to clean these off. Though they are lightweight, skeletonized AR 15 parts have considerably higher surface area, meaning it’s a lot easier for these to get dirty.
Use a nylon brush to clean off any skeletonized parts and pay close attention to the holes and crevices where dirt, dust, tar and fouling may be lurking.

Make Sure Your Rifle Is Dry, Then Reassemble
Once you’ve completely cleaned these major components of the rifle, reassemble in the reverse order mentioned here, and store your rifle. You’re now ready to get back to the range.

